 花花鞋
花花鞋
1、前言
使用过Lua的朋友都知道它的强大,今天我们介绍一个非常有用的Lua工具depgraph,这个工具可以打印lua里面“直接加载”和“懒加载”的lua文件。
问题:
随着项目工程的规模越来越大,lua文件数会越来越多,也许你会划分一些核心的模块,并且希望这些模块简单纯粹,不需要把一些无关的lua require进来。我们可以借助这个工具帮助我们分析自己的依赖项。
名词解释:
- 直接加载:在文件头部显示申明的require 语句
- 懒加载:在方法中申明的require,这些只会在运行时被出触发
2、depgraph使用
depgraph的源码仓库地址:链接
2.1、depgraph命令概要
|
1 |
luadepgraph -m <需要分析的目录> --root <指定lua文件入口> --dot > <输出dot格式文件> |
以上列举了一个常用的命令的示例,下面解释一个这个示例:
- -m : 指定分析的lua文件目录,圈定了depgraph要分析的范围
- –root: 指定从哪个文件开始分析。这里需要注意的是如果前面用的是 -m 方式指定目录,那么这里需要时模块名,模块名的格式是以点符号分隔的,例如:“xx.xx.xx”。如果前面是用 -e 方式指定的目录,那么这里应该是lua的相对路径格式,例如:“xx/xx/xx.lua” (注意:这里文档readme没有讲,我也是翻代码才了解的,下面也会介绍)
- –dot:会用dot语言,以树状图的方式来描述依赖关系
2.2、简单依赖示例
我们建3个文件:test_main.lua, lib1.lua, lib2.lua,目录结构如下:
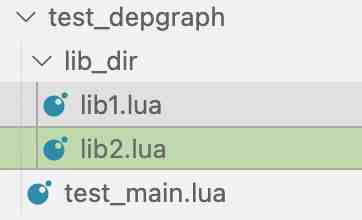
我们让test_main.lua 依赖 lib1.lua, lib1.lua依赖lib2.lua。他们的代码如下:
test_main.lua:
|
1 |
require "test_depgraph.lib_dir.lib1" |
lib1.lua:
|
1 |
require "test_depgraph.lib_dir.lib2" |
lib2.lua
|
1 2 |
local M = {} return M |
我们运行luadepgraph命令:
|
1 |
luadepgraph -m test_depgraph --root test_depgraph.test_main --dot |
结果:
|
1 2 3 4 5 6 7 |
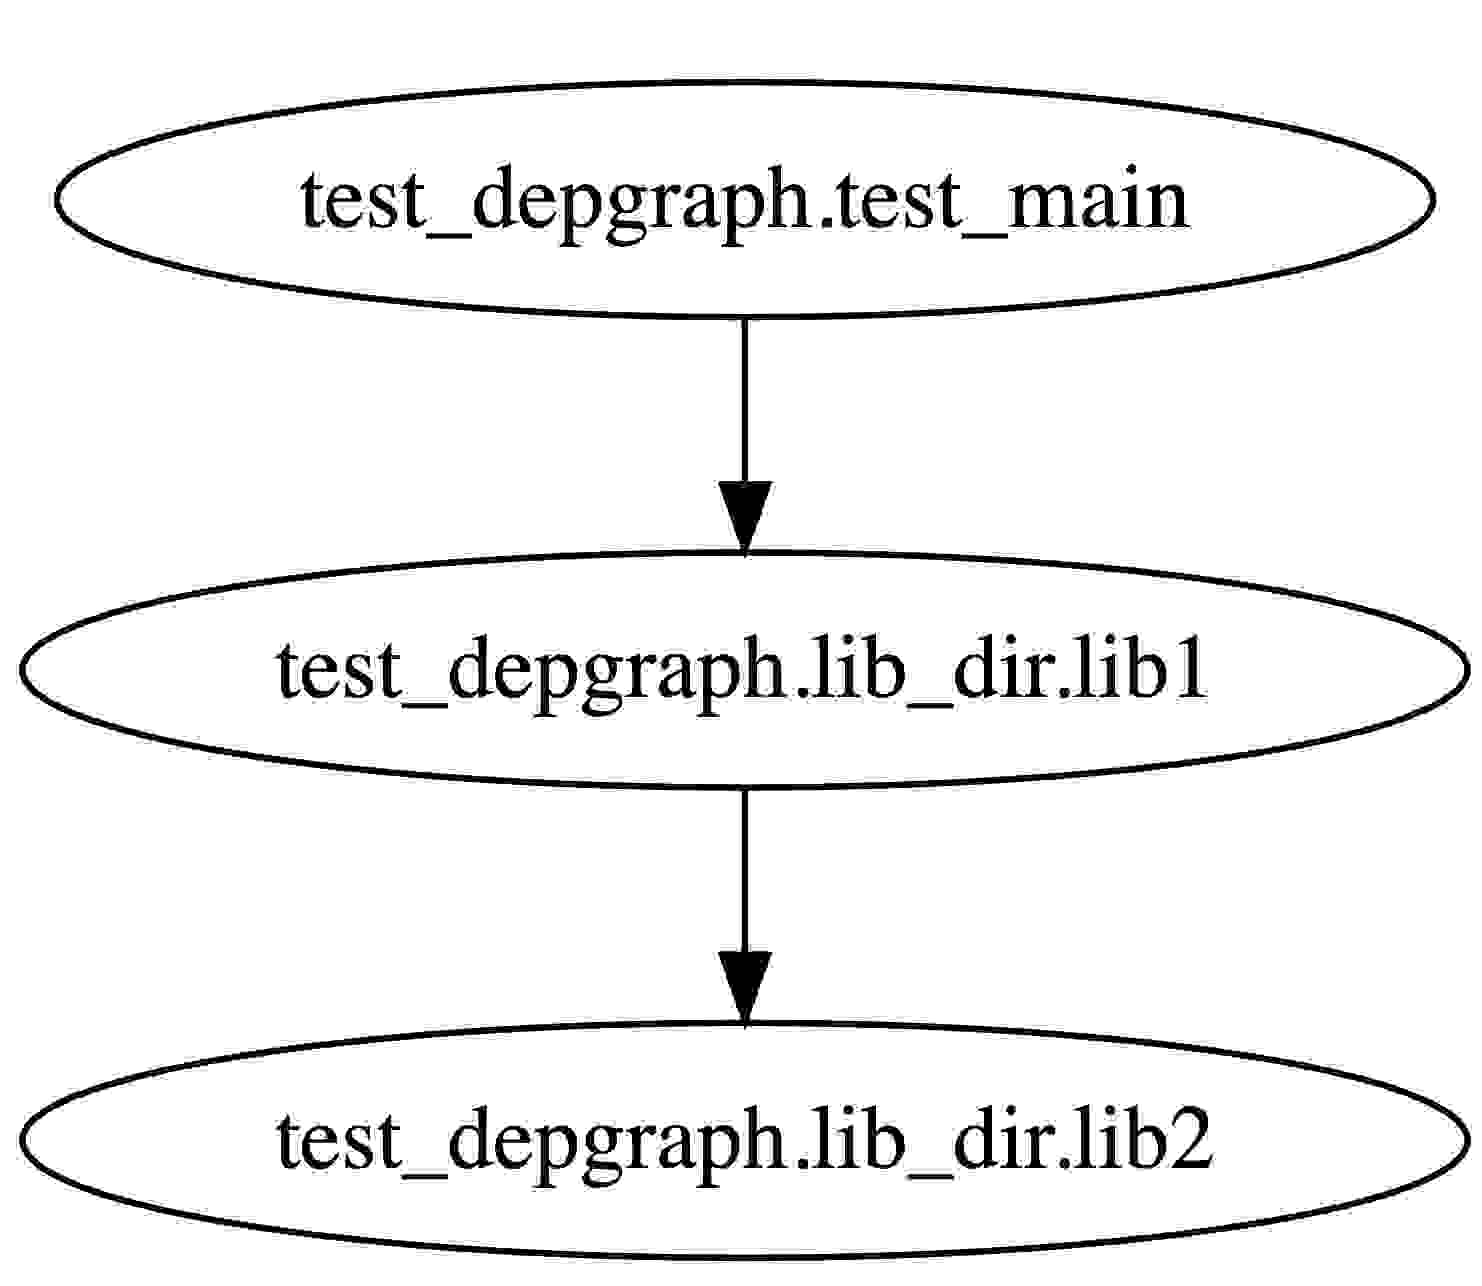
digraph "depgraph" { 1 [color = black label = "test_depgraph.lib_dir.lib1"] 2 [color = black label = "test_depgraph.lib_dir.lib2"] 1 -> 2 [color = black style = solid] 3 [color = black label = "test_depgraph.test_main"] 3 -> 1 [color = black style = solid] } |
我们得到了一个dot格式的文本内容,我们将这个文本内容放在dot图片在线生成工具,得到依赖图如下:
2.3、循环依赖示例
我们将lib2 依赖 test_main,并修改命令添加参数检测循环依赖,看看会发生什么。
test_main.lua改为如下:
|
1 2 3 |
require "test_depgraph.test_main" local M = {} return M |
我们的命令行添加一个选项 –cycles,如下:
|
1 |
luadepgraph -m test_depgraph --root test_depgraph.test_main --cycles |
输出结果如下:
|
1 2 3 4 5 |
1 circular dependency found. The shortest circular dependency has length 3: test_depgraph.lib_dir.lib1 depends on test_depgraph.lib_dir.lib2 on line 1, column 1 test_depgraph.lib_dir.lib2 depends on test_depgraph.test_main on line 1, column 1 test_depgraph.test_main depends on test_depgraph.lib_dir.lib1 on line 1, column 1 |
从结果可以看出已经检测出了这个循环依赖的问题,而且详细记载了这个循环的信息。
我们再看下dot图是什么样的,命令结果如下:
|
1 2 3 4 5 6 7 8 9 |
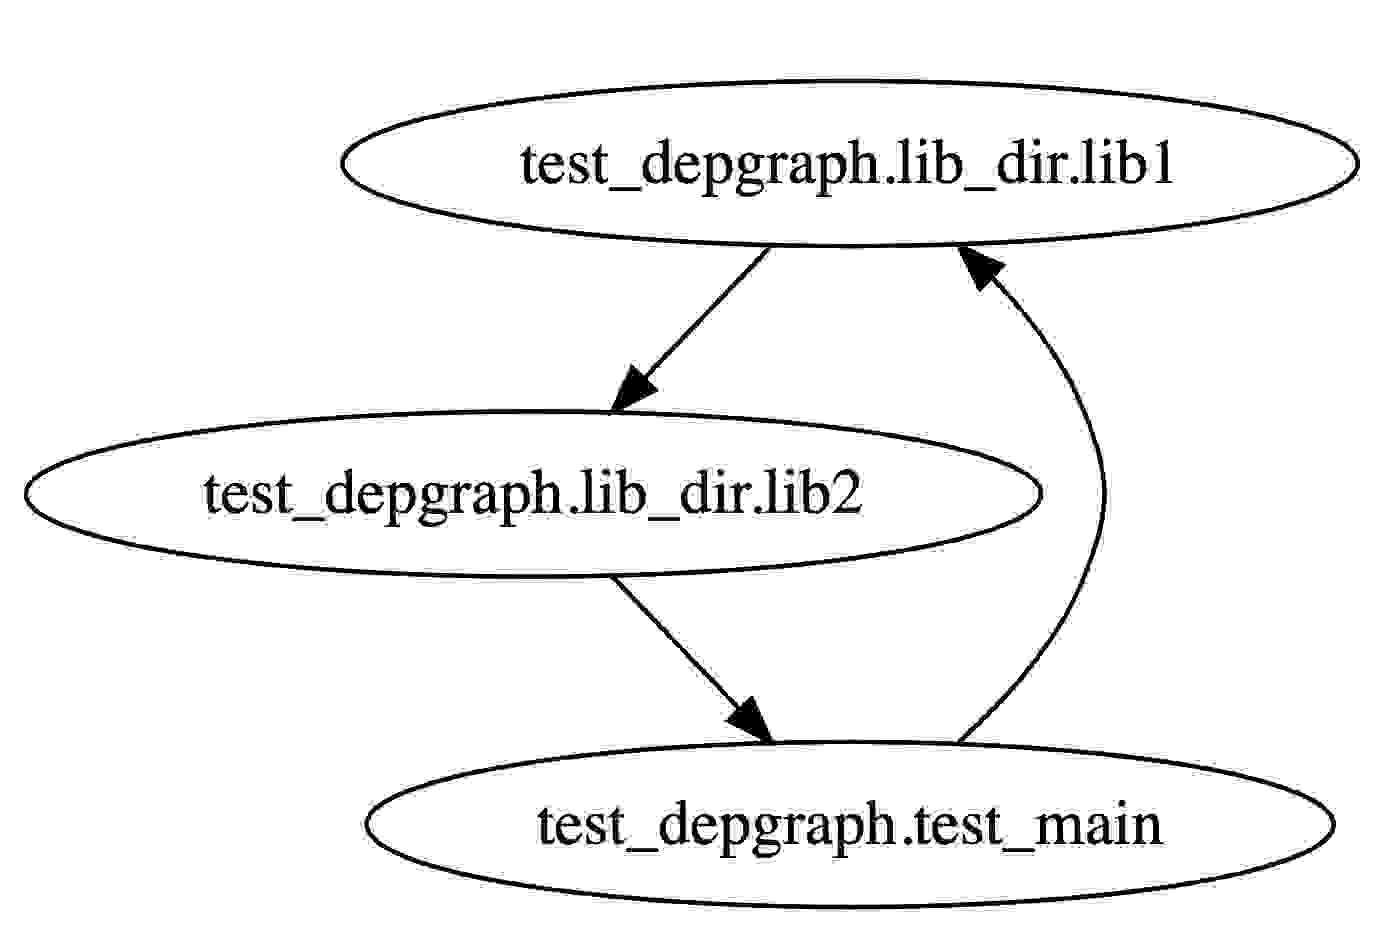
ali@gang my_lua % luadepgraph -m test_depgraph --root test_depgraph.test_main --dot digraph "depgraph" { 1 [color = black label = "test_depgraph.lib_dir.lib1"] 2 [color = black label = "test_depgraph.lib_dir.lib2"] 1 -> 2 [color = black style = solid] 3 [color = black label = "test_depgraph.test_main"] 2 -> 3 [color = black style = solid] 3 -> 1 [color = black style = solid] } |
dot图如下,这个图也很直观的反应了这个循环依赖问题:
好了,到这一步你们基本上已经掌握luadepgraph的使用技巧了。接下来想要了解详细更多参数使用,可以参考github中的描述
3、构建depgraph工程
depgraph工程里面是用luarocks构建的,所以我们可以把源码下载下来后也用同样的方式构建。构建命令如下:
|
1 |
luarocks --lua-version=5.3 make depgraph-scm-1.rockspec |
我们用的是luarocks的make命令,并使用lua-version指定lua版本为5.3。而 “depgraph-scm-1.rockspec” 是depgraph工程根目录的rockspec格式文件,用于构建使用。该命令的运行输出如下:
|
1 2 3 4 |
depgraph scm-1 depends on lua >= 5.1, < 5.4 (5.3-1 provided by VM) depgraph scm-1 depends on argparse >= 0.6.0 (0.7.1-1 installed) depgraph scm-1 depends on luafilesystem >= 1.6.3 (1.8.0-1 installed) depgraph scm-1 is now installed in /Users/ali_1/.luarocks (license: MIT) |
到这一步我们已经将lua源码构建成可执行文件并安装系统环境了。
4、depgraph 源码初分析
我们尝试打开上面输出中安装目录(/Users/ali_1/.luarocks)看看有什么:

我们在bin目录下面找到luadepgraph shell脚本,里面记录了luadepgraph库的位置,我们同样的方式打开那里对应的文件,看到内容如下:
|
1 2 |
#!/usr/bin/env lua require("depgraph.cli")(arg) |
这行代码的意思是使用lua的环境,执行了require命令,require了depgraph.cli模块,并用返回的function类型的匿名对象直接调用执行,传入arg做为参数。
好了,我们已经找到了depgraph的入口了,即depgraph.cli模块,我们可以分析源码了。
看cli这个名字就能很快联想到这是一个解析命令行参数的入口文件。打开这个文件我们可以看到核心的下面几个部分:
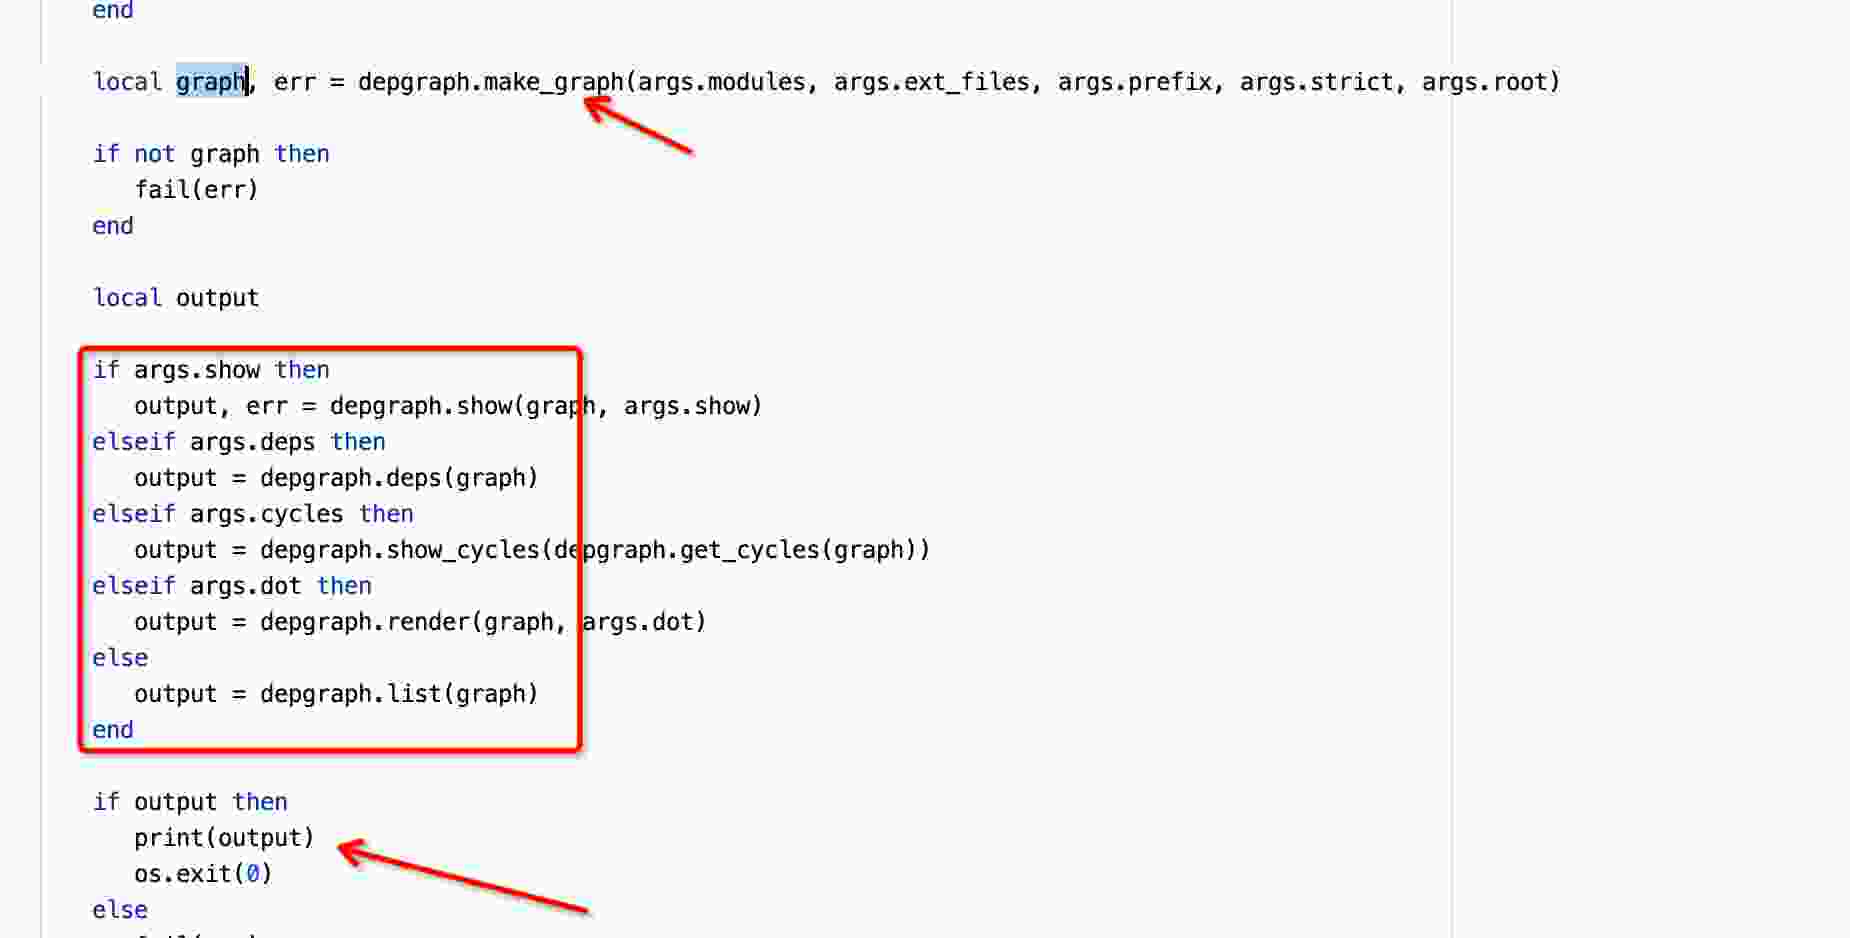
- depgraph.make_graph:这个方法将设置进来的lua目录进行解析得到完整的依赖关系图
- args 解析,通过命令行参数做对应的操作。例如:cycles就是上面提到获取循环依赖信息
- 最后print打印这些信息
那么这个require的depgraph是啥呢,我们找到配置文件(.rockspec结尾的文件),我们看到depgraph对应的是src/depgraph/init.lua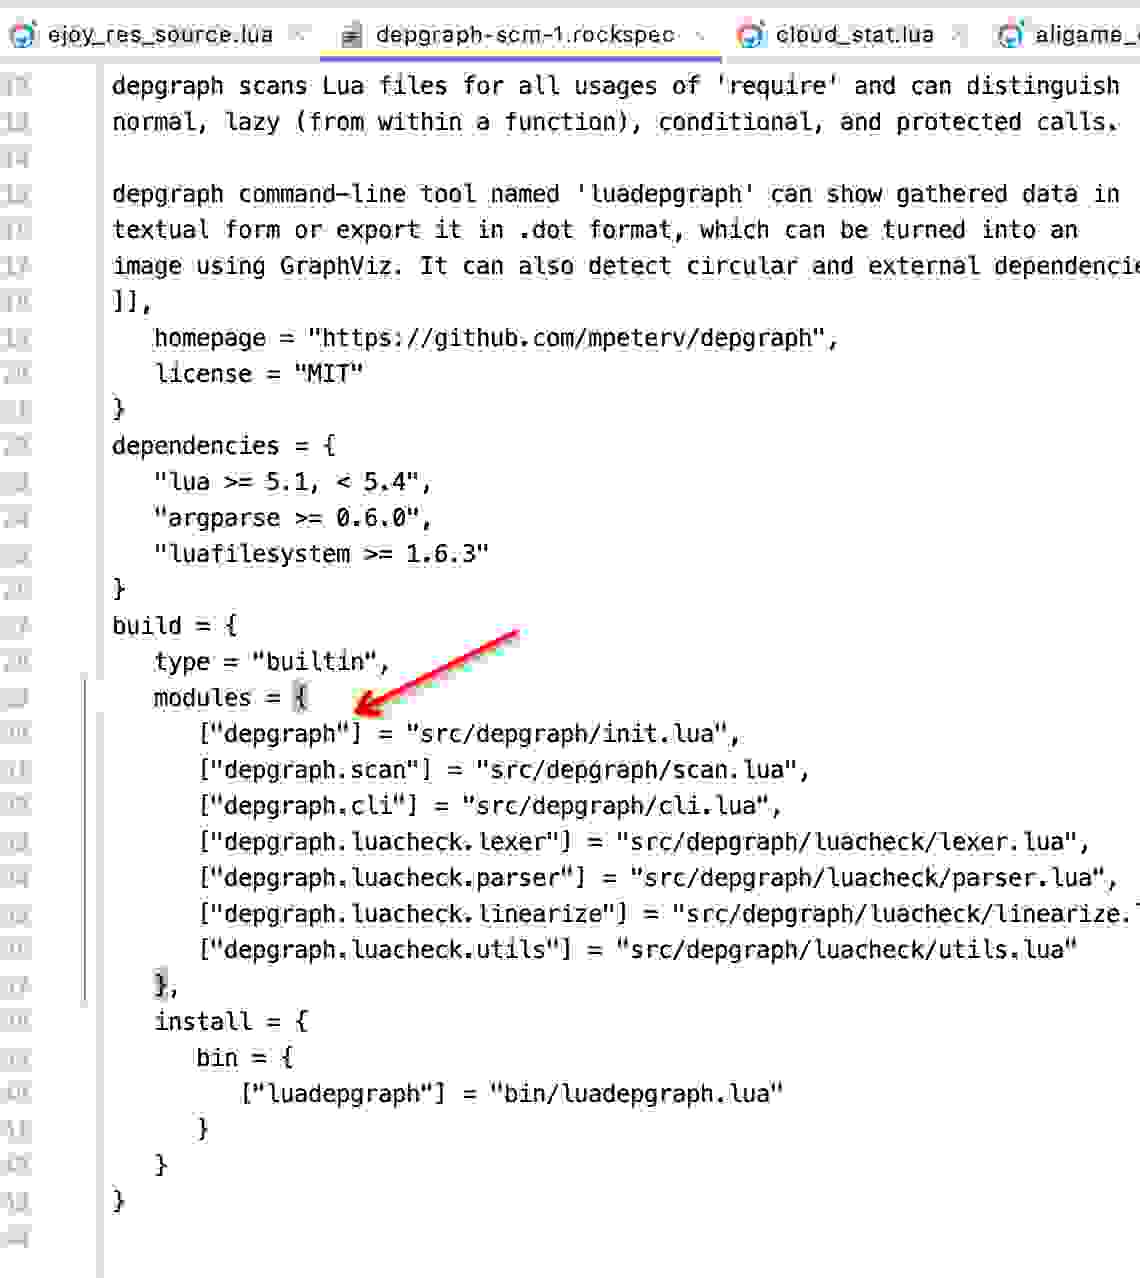
我们看一下我们示例中用到的dot命令对应的是render方法。也就是这里的init.lua的render方法。
4.1、render方法
|
1 2 3 4 5 6 7 8 9 10 11 12 13 14 15 16 17 18 19 20 21 22 23 24 25 26 27 28 29 30 31 32 33 34 35 36 37 38 39 40 41 42 43 44 |
-- Return graph representation in .dot format. function depgraph.render(graph, title) local lines = {("digraph %q {"):format(title)} local ids = {} local next_id = 1 local add_edges local function add_node(file_object, color) if not ids[file_object] then ids[file_object] = next_id table.insert(lines, ("%d [color = %s label = %q]"):format(next_id, color, file_object.name)) next_id = next_id + 1 end end function add_edges(file_object) for _, dep in ipairs(file_object.deps) do if not ids[dep.name] then local dep_file = graph.modules[dep.name] or {name = dep.name} add_node(dep_file, dep_file.deps and normal_module_color or external_module_color) ids[dep.name] = ids[dep_file] end table.insert(lines, ("%d -> %d [color = %s style = %s]"):format( ids[file_object], ids[dep.name], dep.protected and protected_dep_color or normal_dep_color, dep.lazy and lazy_dep_style or (dep.conditional and cond_dep_style or normal_dep_style))) end end for _, file_object in ipairs(graph.ext_files) do add_node(file_object, external_file_color) add_edges(file_object) end for _, file_object in ipairs(graph.modules) do add_node(file_object, normal_module_color) add_edges(file_object) end table.insert(lines, "}") return table.concat(lines, "\n") end |
总结一下这里的逻辑是遍历graph对象里面的modules(.分隔形式表示)和ext_files(普通目录形式)的deps(依赖信息),然后添加节点(node)和边(edge)得到一个符合dot规范的依赖关系文件。这个文件可以用于生成dot依赖关系图。也就是说这里是把graph信息整理并表达成dot图。
那么真正的信息还是在graph里面,想要了解里面的信息如何生成的可以再继续看make_graph方法。
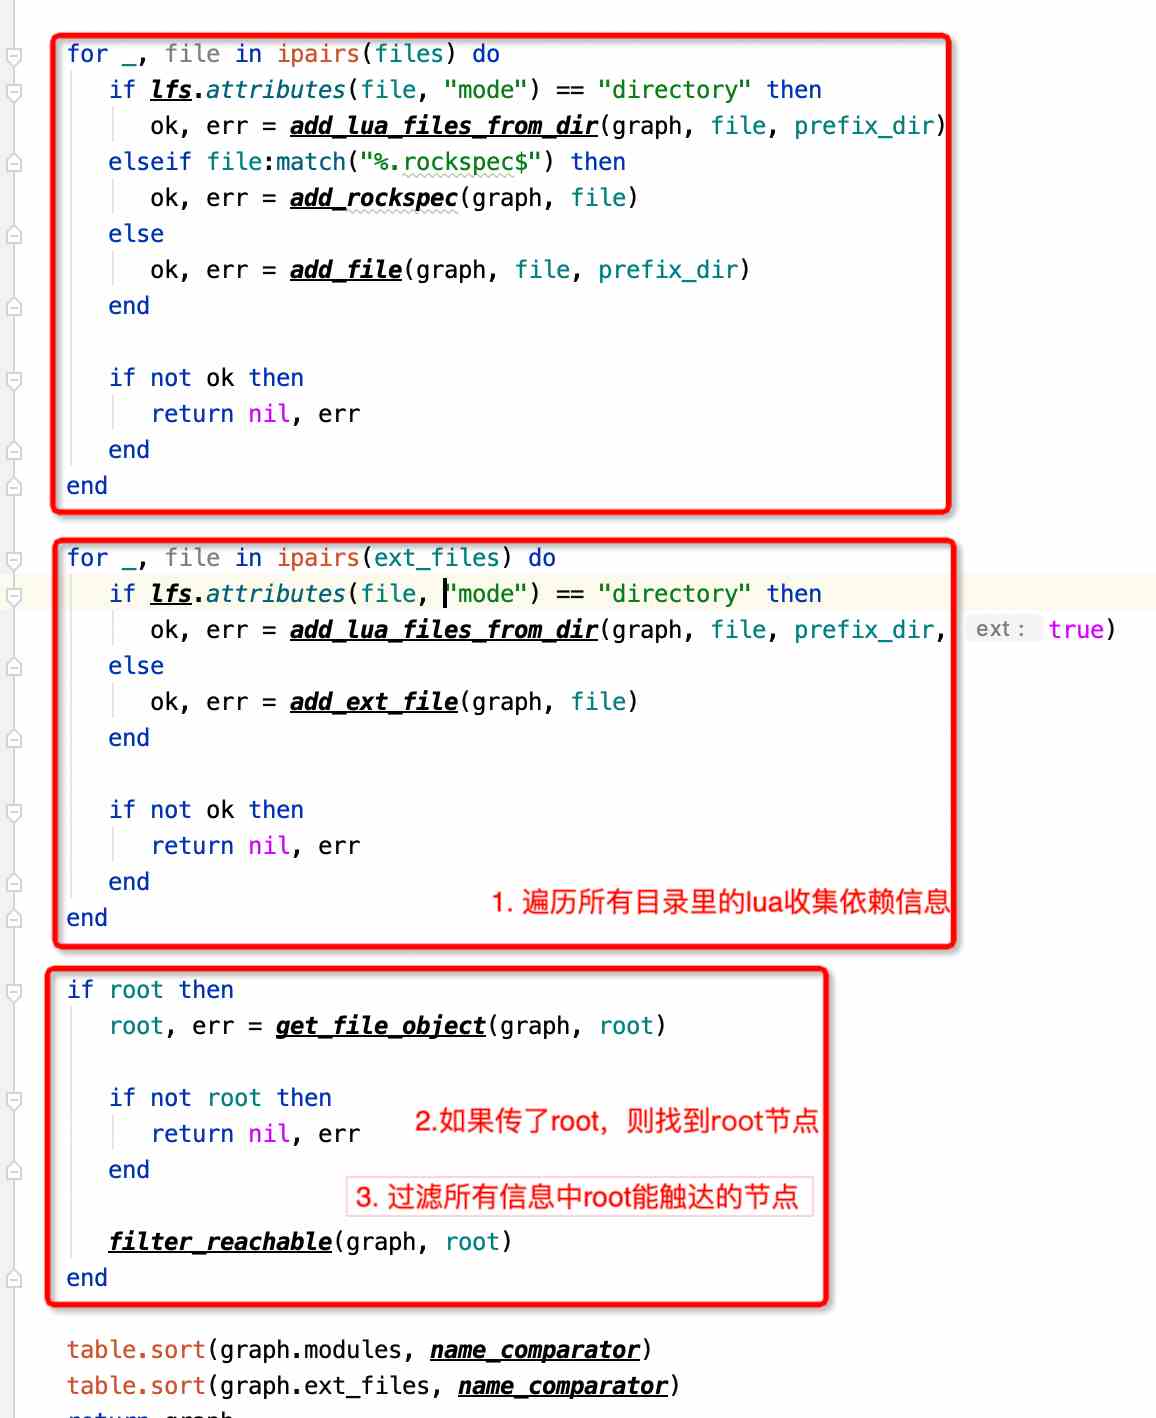
里面相关的分3步:
- 遍历所有目录的lua文件收集依赖信息
- 如果设置了root,则先从所有模块张找到该root节点的信息
- 从root开始filter_reachable,找到该节点的依赖树信息
好了,到此我们已经了解了depgraph的基本命令行的使用,你也了解了如何看源码,修改源码,重新构建depgraph工程了。相信这个工具在日常的开发中能给与你一些有价值的帮助~